Creating salon-quality nails at home isn’t just possible—it’s achievable with the right techniques and tools. Here’s a comprehensive guide to perfecting your at-home manicure routine.
Essential Tools
Before beginning, gather these essentials:
- Nail polish remover (acetone-based for gel removal, non-acetone for regular polish)
- Cotton pads or lint-free wipes
- Nail clippers and files
- Buffer block
- Cuticle oil and pusher
- Base coat, color polish, and top coat
- Clean-up brush or angled makeup brush
- Moisturizing hand cream
Step-by-Step Process
1. Prepare Your Workspace
Set up in a well-ventilated, well-lit area with a stable surface. Place a towel or paper towel beneath your hands to catch spills and create a clean work surface.
2. Remove Old Polish
Thoroughly remove existing polish with remover and a cotton pad. For stubborn polish, hold the soaked pad against the nail for 10-15 seconds before wiping.
3. Shape Your Nails
Clip nails if necessary, then file to your desired shape—square, round, oval, almond, or coffin. File in one direction rather than sawing back and forth to prevent splitting and peeling.
4. Soak and Soften
Soak fingertips in warm water with a drop of gentle soap for 2-3 minutes to soften cuticles. Dry thoroughly afterward.
5. Cuticle Care
Apply cuticle oil to the base of each nail. Gently push back cuticles with a wooden or rubber pusher. Avoid cutting cuticles, as they protect your nail bed from bacteria.
6. Buff and Smooth
Lightly buff nail surfaces to remove ridges and create a smooth canvas. Use gentle pressure to avoid thinning nails too much.
7. Clean and Prep
Wipe nails with polish remover or alcohol to remove oils and residue that could interfere with polish adhesion.
8. Apply Base Coat
Paint a thin layer of base coat from base to tip. This prevents staining and helps polish adhere better for longer wear.
9. Color Application
Apply color polish in thin, even layers:
- Start with a stripe down the center
- Follow with strokes on either side
- Leave a tiny gap between polish and cuticle
- Allow each coat to dry for 1-2 minutes before applying the next
- Most colors need 2-3 coats for opacity
10. Seal with Top Coat
Apply a quality top coat to protect the color and add shine. Extend it slightly over the tip edge to prevent chipping.
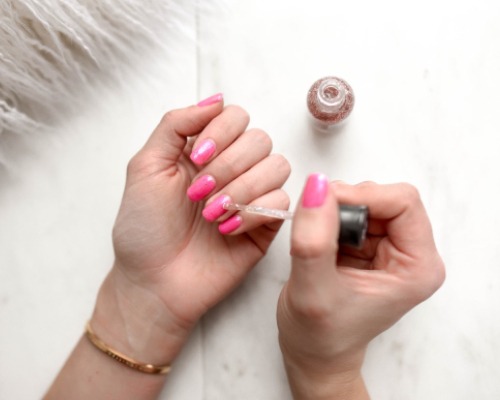
11. Clean Up Mistakes
Use a small angled brush dipped in polish remover to clean around edges and fix any errors.
12. Dry Completely
Allow 15-20 minutes for surface drying and several hours for complete hardening. Quick-dry drops or sprays can help speed this process.
13. Moisturize
Once polish is dry to the touch, apply cuticle oil and hand cream to rehydrate skin and cuticles.
Pro Tips for Long-Lasting Results
- Apply thin coats rather than thick ones—they dry faster and last longer
- Cap the free edge of nails with each coat to prevent chipping
- Wait 2-3 minutes between each coat to prevent bubbling
- Store polish in a cool, dark place and roll bottles between palms rather than shaking to mix
- Apply a fresh top coat every 2-3 days to extend wear time
- Wear gloves when cleaning or washing dishes to protect your manicure
Troubleshooting Common Issues
- Bubbles in polish: Caused by shaking polish or applying thick layers. Roll bottles instead and apply thin, even coats.
- Smudges: Ensure each layer is dry before applying the next or touching anything.
- Chipping: Use base coat, cap the free edge, and refresh top coat regularly.
- Streaky application: Try a different polish formula or apply thinner, multiple coats.
With practice and patience, your at-home manicures can rival professional results, saving time and money while allowing creative expression through your nail style.