Hey there! Let’s dive into the wonderful world of perms! A “perm” (short for “permanent hairstyle”) is a chemical treatment that transforms straight hair into beautiful curls, waves, or ringlets. Despite the name, modern perms are actually more semi-permanent, typically lasting several months depending on your hair care routine and growth rate.
How Do Perms Actually Work?
Perms are pretty fascinating from a scientific perspective! They work at the molecular level by chemically altering your hair’s protein structure. Your stylist will use various sizes of rods and rollers to create natural-looking curls (because who wants all their curls to be exactly the same size, right?).
Did you know? The basic chemistry behind perms has been around since the early 1900s, but the techniques have improved dramatically over the decades!
There are two main types of perms you might encounter:
Cold Perms
Cold perms (also called traditional perms) are perfect for thicker, coarser hair types. Here’s how they work:
- Your stylist wraps your hair around rollers or rods
- They apply an alkaline solution that breaks down your hair’s keratin bonds
- After about 20 minutes, they apply a neutralizer that “locks in” your new curl pattern
These typically create tighter, more voluminous curls with lots of bounce!
Hot Perms
Hot perms (or digital perms) work wonderfully for finer hair types. They create those gorgeous, silky beach waves everyone loves! The process includes:
- Using a milder chemical solution compared to cold perms
- Wrapping hair around heated rollers to activate the solution
- A longer processing time (up to two hours) – so maybe bring something to read!
Is a Perm Right for Your Hair?
Perms work best on hair that’s:
- Healthy and strong
- Not heavily bleached or colored
- At least 2 inches long (ideally shoulder-length or longer)
Have naturally curly hair already? Perms can still be great for you! Many people with curly hair get perms to make their curls more uniform or to add extra body and bounce.
How Long Will Your Perm Last?
Most perms last between 3-6 months. The longevity depends on:
- Your hair’s natural condition
- How well you care for it after perming
- Your hair growth rate
Virgin, unprocessed hair tends to hold perms the longest. If you want to maintain your look, your stylist can do “root touch-up” perms to keep everything looking uniform as your hair grows.
Caring For Your Fabulous New Perm
Want your perm to look amazing for as long as possible? Here are my top tips:
- Be patient! Don’t wash or condition your hair for 48 hours after perming
- Use products specifically formulated for curly hair
- Apply heat protectant if you use styling tools
- Get regular trims to keep those ends healthy
- Air dry when possible (or use a diffuser attachment)
- Avoid aggressive brushing that can cause frizz
Helpful tip: When detangling permed hair, use a wide-tooth comb and work from the ends up, not from the roots down!
Do Perms Damage Hair?
With proper care, perms shouldn’t significantly damage your hair. Modern solutions are much gentler than those from the 1980s (whew!). However, it’s best to:
- Limit perms to 1-2 times per year
- Wait 8-10 months between perms when possible
- Choose hot perms for less damage if you have finer hair
Styling Your New Curls
New to the curly life? Don’t worry! Your stylist will give you personalized styling tips before you leave the salon. In general, curly hair loves:
- Leave-in conditioners
- Curl-enhancing creams and mousses
- Occasional refresher sprays between washes
- Scrunching techniques rather than brushing
Did you know? Sleeping on a silk or satin pillowcase can help maintain your curls overnight by reducing friction and frizz!
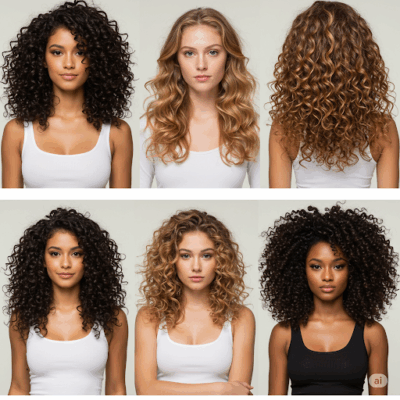
Different Perm Styles and Techniques
Did you know there are many more perm styles beyond just the basic curl? Modern perming has come a long way!
- Body Waves: These create loose, natural-looking waves rather than tight curls – perfect if you want volume without the ringlets!
- Spiral Perms: Creates corkscrew curls using long rods wrapped vertically
- Stack Perms: Curls only the middle and bottom sections while leaving the top layers straighter
- Root Perms: Only perms the roots for added volume while leaving the rest of your hair as is
- Spot Perms: Targets specific sections of hair rather than your entire head
Helpful tip: Bring photos to your stylist to show exactly what type of curl pattern you’re hoping for!
The Consultation Process
Before getting a perm, a good stylist will:
- Analyze your hair type and condition
- Discuss your lifestyle and styling routine
- Consider your face shape
- Perform a strand test to see how your hair reacts to the chemicals
Don’t skip this important step! A thorough consultation helps prevent unwanted surprises.
Cost and Time Investment
Wondering about the practical side of perms?
- Most perms cost between $50-$200+ depending on your location, salon, and hair length
- The process typically takes 1-3 hours in the salon
- You’ll need to factor in maintenance costs for special products
Did you know? While the upfront cost might seem high, many people find they actually save money on styling products and tools in the long run!
Who Should Avoid Perms?
Perms aren’t for everyone! You might want to skip perming if:
- Your hair is severely damaged from bleaching or chemical treatments
- You’ve recently had a keratin treatment or relaxer
- You’re pregnant (hormone changes can affect how the perm takes)
- You have certain scalp conditions or sensitivities to chemicals
- Your hair has been hennaed (henna can react unpredictably with perm solutions)
The Growing-Out Phase
How do you deal when your perm starts growing out? This transition period can be tricky!
- Regular trims help blend the line between permed and natural hair
- Layered cuts can disguise the changing texture
- Half-up hairstyles can hide awkward transition areas
- Headbands and accessories become your best friends!
Environmental Factors That Affect Your Perm
Ever wonder why your perm might look different from day to day?
- Humidity can make curls tighter and frizzier
- Dry air can make curls fall flat
- Hard water minerals can build up and weigh down curls
- Swimming in chlorinated pools can alter your curl pattern
Helpful tip: Wear a swim cap in pools, and rinse with clean water immediately after swimming in the ocean!
The History of Perms
The perm has a fascinating history! Did you know that:
- The first machine for permanent waving was invented in 1906 by Karl Nessler
- Early perms used borax paste and heat up to 212°F (yikes!)
- The “cold wave” perming process was developed in the 1940s
- Perms reached peak popularity in the 1980s with the “big hair” trend
Pre-Perm Prep Work
For the best results, prepare your hair before your appointment:
- Stop using silicone-based products 1-2 weeks before
- Deep condition regularly in the weeks leading up to your perm
- Avoid heat styling for several days before
- Go to your appointment with clean but not freshly washed hair (24-48 hours unwashed is ideal)
Complete Before and After Care Guide for Your Perm
Getting the perfect perm isn’t just about what happens in the salon chair—it’s about how you prepare your hair beforehand and care for it afterward! Let’s break down the detailed routines for both phases to help your perm look fabulous for as long as possible.
Before Your Perm: Preparation is Key!
2-3 Weeks Before
Start preparing your hair early for the best results:
- Begin deep conditioning treatments: Use a moisture-rich mask once a week to strengthen your hair
- Trim those ends: Get rid of split ends and damage that could affect how evenly your perm takes
- Ease up on heat styling: Reduce blow drying, straightening, and curling to minimize damage
- Stop chemical treatments: No coloring, highlighting, or other chemical processes during this time
Did you know? The healthier your hair is before perming, the better and longer-lasting your results will be!
1 Week Before
- Switch to silicone-free products: Silicones can create a barrier that prevents the perm solution from penetrating evenly
- Clarify your hair: Use a clarifying shampoo to remove product buildup (but only do this once!)
- Increase hydration: Step up your conditioning game to prepare your hair fibers
- Talk to your stylist: Have your consultation to discuss your goals and expectations
2-3 Days Before
- Skip the oils and heavy conditioners: These can interfere with the perm solution
- Avoid hairspray and styling products: Clean hair takes the perm solution more evenly
- Wash your hair: This should be your last wash before the appointment
Day Before/Day Of
- Don’t wash your hair: The natural oils will help protect your scalp during the chemical process
- Avoid tight hairstyles: No ponytails or styles that create kinks or dents
- Arrive with dry, detangled hair: Unless your stylist specifically asks otherwise
- Wear button-up clothing: So you don’t have to pull anything over your head after the perm
Helpful tip: Take a “before” photo so you can appreciate the transformation later!
After Your Perm: Critical Care Phase
First 48 Hours (The Most Critical Period!)
These first two days determine how well your perm sets, so follow these rules religiously:
- Hands off! Resist touching or playing with your new curls
- No washing or wetting: Keep your hair completely dry for 48 hours
- Skip the styling products: No mousses, gels, or sprays during this setting period
- No ponytails, clips, or headbands: Anything that bends or creases your hair can affect the curl pattern
- Sleep on a silk pillowcase: Or wrap your hair in a silk scarf to reduce friction
- No hats or tight-fitting headwear: These can flatten your new curls
Did you know? During these first 48 hours, the chemical bonds in your hair are still settling into their new formation!
First Week After
- First wash (after 48 hours): Use lukewarm (never hot!) water and sulfate-free shampoo
- Gentle handling: Don’t rub or twist your hair while washing—just let the water flow through
- Start using curl-specific products: Now’s the time to introduce curl enhancers
- Pat dry with microfiber towel or t-shirt: No rough towel drying
- Avoid heat styling: Let your curls air dry for this first week
- Use wide-tooth combs only: No brushes that might disrupt curl formation
Weeks 2-4
Now you can establish your regular perm maintenance routine:
- Wash 2-3 times per week: Over-washing can dry out permed hair
- Use sulfate-free, curl-enhancing shampoo: Look for products labeled for permed or curly hair
- Deep condition weekly: Keep those curls hydrated and bouncy
- Apply leave-in conditioner after every wash: This is essential for moisture retention
- Introduce styling products gradually: Find what works for your specific curl type
- Minimal heat styling: If you must use heat, keep it on low settings with heat protectant
Helpful tip: “Pineappling” your hair (loosely gathering it at the top of your head) before sleep can help maintain your curl pattern overnight!
Ongoing Maintenance (1 Month+)
- Regular trims every 6-8 weeks: Prevents split ends from traveling up the hair shaft
- Monthly protein treatments: Helps strengthen chemically treated hair (but don’t overdo it!)
- Clarify occasionally: Use a clarifying shampoo once a month to remove product buildup
- Adjust your routine seasonally: You may need more moisture in winter, more frizz control in summer
- Refresh between washes: Use a water spray with a tiny bit of conditioner to reactivate curls
- Protect from sun and chlorine: Use hair sunscreen and swim caps when needed
Emergency Care: When Things Go Wrong
If your perm isn’t behaving as expected:
- Extreme frizz: Try an anti-frizz serum and deep conditioning treatments
- Curls falling flat: Could be product buildup—try clarifying, then using lighter products
- Uneven curls: Visit your stylist for help; they might be able to spot-fix certain areas
- Excessive dryness: Step up moisture with overnight treatments and oils on your ends
Did you know? You should wait at least two weeks before coloring freshly permed hair to prevent additional damage.