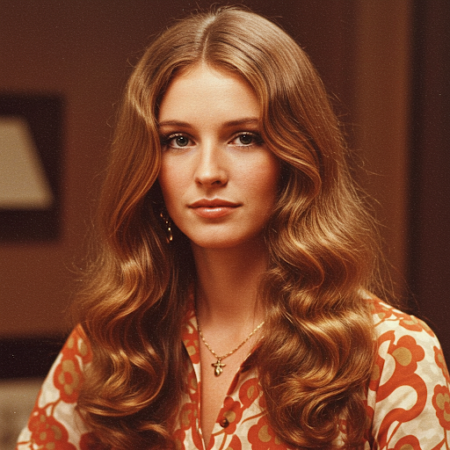
The allure of Hollywood waves lies in their seemingly effortless elegance, a perfect blend of relaxed texture and polished glamour. Achieving this coveted look involves a careful combination of preparation, technique, and the right products. Let’s delve deeper into each step to help you recreate these red-carpet-worthy waves.
1. Laying the Foundation: Hair Preparation
- Choosing the Right Cleansing Products: Start with a shampoo and conditioner specifically designed to add volume and shine. Lightweight formulas are key; avoid heavy products that can weigh the hair down and make it difficult to achieve lift. Look for ingredients like biotin, collagen, or lightweight silicones that enhance body and luster.
- The Importance of Heat Protection: This step cannot be overstated. Before any heat styling, liberally apply a high-quality heat protectant spray throughout your hair, from roots to ends. This creates a barrier against heat damage, preventing breakage, frizz, and dullness – all enemies of the smooth, shiny Hollywood wave.
- Boosting Volume from the Start: While your hair is still damp, apply a volumizing mousse or root-lifting spray directly to the roots. Use your fingers to distribute the product evenly, focusing on the crown and sides where you desire the most lift. For finer hair, consider a lightweight thickening lotion applied throughout the mid-lengths and ends for added body.
- Considering Your Natural Texture:
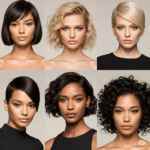
- Straight Hair: Requires more effort to create and hold waves. Focus on using the right products and techniques to build volume and ensure the curls set properly.
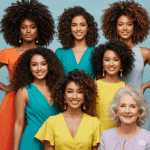
- Wavy Hair: You have a natural advantage! Enhance your existing texture with products that define and control frizz. You might need less heat styling to achieve the desired look.
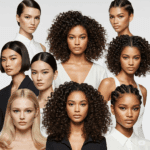
- Curly Hair: Blow-drying with a smoothing nozzle or even a light straightening might be necessary to create a smoother base for the Hollywood wave. Use curl-defining products to control frizz and create a more uniform wave pattern.
2. Sculpting the Waves: The Curling Techniques
- Selecting Your Styling Tool:
- Large Barrel Curling Iron (1.25-1.5 inches): This is the go-to for creating the soft, loose waves characteristic of the Hollywood look. The larger barrel creates wider, more relaxed curls.
- Curling Wand (Tapered or Straight): A tapered wand can create more variation in the wave size, while a straight wand will produce more uniform waves. Practice will help you determine which tool you prefer.
- Sectioning for Control: Divide your hair into manageable sections using clips. Start with the bottom layer and work your way up. Smaller, more controlled sections will result in more defined and consistent waves.
- The Wrapping Method:
- Curling Iron: Hold the iron vertically with the clamp facing outwards. Wrap a section of hair around the barrel, starting about midway down the strand and leaving the ends out (about 1-2 inches). This prevents the ends from becoming too curly and maintains a more modern, relaxed feel. Hold for a few seconds (5-10, depending on your hair thickness) and then release, gently pulling the curl down to elongate it slightly.
- Curling Wand: Wrap the hair around the barrel, again starting midway down and leaving the ends out. Hold for a few seconds and release.
- Alternating Wave Direction: This is crucial for achieving that natural, non-uniform look. Curl some sections of hair away from your face and others towards your face. This prevents the waves from clumping together and creates more movement and dimension.
- Cooling for Longevity: Allow each curl to cool completely before touching or brushing it. This helps the curl set and last longer. You can even gently pin the warm curls to your head with clips to further encourage the shape.
3. Refining and Polishing: Styling and Finishing
- Gentle Separation: Once all your hair is curled and cooled, avoid using a brush, which can disrupt the wave pattern and cause frizz. Instead, use your fingers or a wide-tooth comb to gently separate the curls. Start at the ends and work your way up, carefully pulling apart any sections that have clumped together.
- Boosting Root Volume Post-Curl: If you find your roots have lost some lift after curling, you can gently tease the hair at the crown using a fine-tooth comb. Focus on the underlayers to keep the teasing hidden. Alternatively, flip your head upside down and gently shake your hair to create natural volume.
- Adding Texture and Hold:
- Texturizing Spray: This is your secret weapon for achieving that effortless, slightly undone texture. Lightly mist a texturizing spray throughout your waves, focusing on the mid-lengths and ends. This will add grip and prevent the waves from falling flat.
- Flexible Hold Hairspray: Finish with a light mist of flexible hold hairspray to keep your waves in place without making them stiff or crunchy. Hold the can about 10-12 inches away from your head and spray evenly.
- Enhancing Shine: A touch of shine serum or hair oil applied to the mid-lengths and ends can add a healthy, glossy finish reminiscent of the red carpet. Use a small amount to avoid weighing the hair down.
- Strategic Brushing (Optional): For a softer, more blended wave, you can gently brush through the very top layer of your hair with a soft bristle brush. This will smooth any flyaways and create a more cohesive look while preserving the overall wave pattern.
Beyond the Basics: Variations and Considerations
- The Side Sweep: A deep side part is a classic element of many Hollywood wave hairstyles. Once your waves are set, create a dramatic side part and allow the hair on one side to cascade over your shoulder for added glamour.
- Adding Accessories: Elegant hair clips, embellished barrettes, or subtle headbands can elevate your Hollywood waves for a special occasion.
- Considering Your Hair Length: The technique might need slight adjustments depending on your hair length. Longer hair can handle larger sections, while shorter hair might require smaller sections and a slightly smaller barrel for more defined waves.
- Face Shape Flattery: Pay attention to how the waves frame your face. You might want to create more volume at the crown if you have a round face or keep the sides closer to your face if you have a longer face shape.
Maintaining Your Hollywood Waves:
To prolong your glamorous waves, consider sleeping on a silk pillowcase to reduce friction and prevent frizz. You can also gently twist your hair into a loose bun or braid before bed to help maintain the wave pattern. A light refresh with a texturizing spray or a quick touch-up with your curling iron the next day can revive your style.
Achieving the perfect Hollywood celebrity wave takes practice and experimentation. Don’t be discouraged if your first attempt isn’t flawless. By understanding the key techniques, using the right products, and paying attention to the details, you’ll be well on your way to mastering this timeless and elegant hairstyle. Remember to look at images of your favorite celebrities with wavy hair for inspiration and adapt the techniques to suit your own hair type and desired look.